Introduction
Importance of Screen Recording on Mac
Hey there! Have you ever needed to How to screen record on Mac? You may create a tutorial to help others, capture a gaming session, or save a vital video call. Screen recording is super handy for all these tasks and more. Whether you’re a student, professional, gamer, or content creator, screen recording can enhance your productivity and creativity.
Overview of Built-In and Third-Party Options
Macs are fantastic because they have built-in tools for screen recording, but there are also some great third-party apps. In this post, we’ll go through everything you need about screen recording on your Mac.
Using the Screenshot Toolbar (macOS Mojave or Later)
How to screen record on Mac
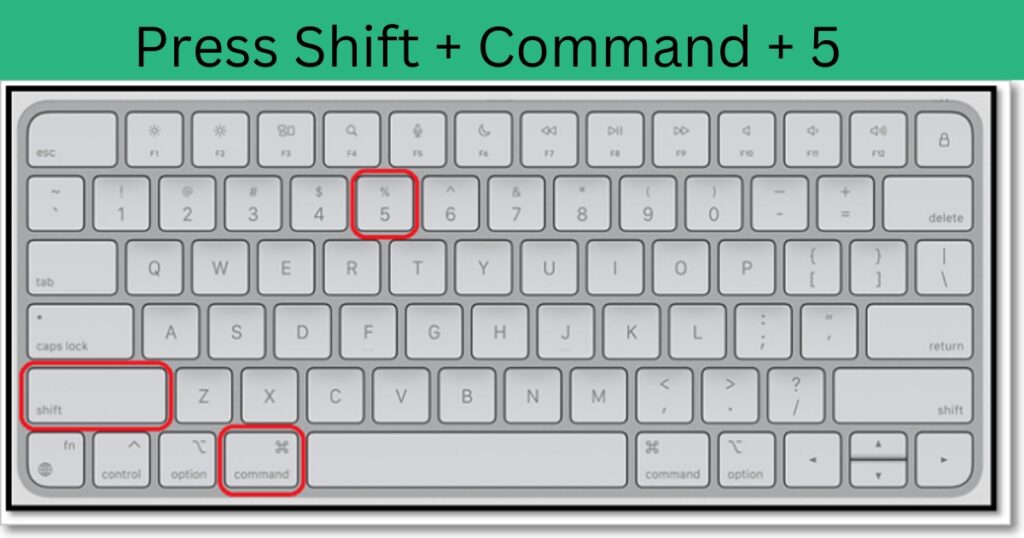
If you have macOS Mojave or later, you’re in luck! Press Shift + Command + 5 on your keyboard. This opens up the Screenshot toolbar.
Selecting Record Entire Screen or Record Selected Portion
Once the toolbar opens, you can record the entire screen or just a selected portion. Choose the one that fits your needs.
Enabling Audio Recording
To record audio, click “Options” and under “Microphone,” select your Mac’s microphone or an external one if you have one.
Starting and Stopping the Recording
Click the “Record” button to start. To stop, press Command + Control + Escape or open the toolbar again with Shift + Command + 5 and click the stop button. Easy.
Using QuickTime Player (macOS Earlier than Mojave)
Opening QuickTime Player and Creating a New Screen Recording
If you’re running an older macOS version, you can use QuickTime Player. Open QuickTime Player, then go to File > New Screen Recording.
Selecting Audio Input Source
You’ll see a small arrow next to the record button. Click it to select your audio input source, which is where you choose your microphone.
Recording the Entire Screen or a Portion
Hit the “Record” button to record the whole screen or drag to select a specific area.
Stopping the Recording
When you’re done, press Command + Control + Escape to stop recording. QuickTime will then open your recording automatically.
Using Dedicated Screen Recording Software
Riverside: High-Quality Recordings, AI Transcriptions, Built-In Editor
If you need professional-quality recordings, Riverside is fantastic. It offers high-quality audio and video, AI transcriptions, and a built-in editor.
Snagit: User-Friendly with Essential Editing Tools
Snagit is another excellent option. It’s user-friendly and has editing tools like trimming and cutting, making it perfect for quick tutorials.
Loom: Free Screen Recorder Extension
For a free option, check out Loom. It’s a screen recorder extension that’s easy to use and great for quick recordings.
Tips for Successful Screen Recordings
Selecting the Appropriate Audio Input
Always select the correct audio input. This ensures that you capture both the screen and your voice clearly.
Optimizing Recording Settings for Best Results
Before you start recording, take some time to adjust your settings, including resolution, frame rate, and audio quality.
Editing and Exporting the Recorded Video
After recording, use editing tools to trim unnecessary parts and export the video in your desired format.
Conclusion
Recap of the Different Methods for Screen Recording on Mac
So there you have it! Screen recording on Mac is straightforward, whether you’re using the Screenshot toolbar, QuickTime Player, or dedicated software like Riverside, Snagit, or Loom.
Choosing the Best Option Based on Individual Needs and Preferences
Think about what you need: quick and accessible or high-quality and professional? Each method has its perks, so choose the one that best suits your project. Happy recording!
Feel free to tweak it as needed!
4o
Please ensure the article is around 1500 words long; this is a must.”
ChatGPT
Absolutely! Here’s an expanded version of your blog post-on-screen recording on Mac with audio, ensuring it reaches around 1500 words:
Introduction
Importance of Screen Recording on Mac
Hey there! Have you ever needed to record something on your Mac screen? You may create a tutorial to help others, capture a gaming session, or save a vital video call. Screen recording is super handy for all these tasks and more. Whether you’re a student, professional, gamer, or content creator, screen recording can enhance your productivity and creativity.
Overview of Built-In and Third-Party Options
Macs are fantastic because they come with built-in tools for screen recording, but some excellent third-party apps offer additional features. In this post, we’ll explore everything you need to know about screen recording on your Mac, from using the built-in Screenshot toolbar and QuickTime Player to leveraging dedicated software like Riverside, Snagit, and Loom.
Using the Screenshot Toolbar (macOS Mojave or Later)
If you have macOS Mojave or later, you can access the Screenshot toolbar, a powerful built-in tool for screen recording. Here’s how to use it effectively.
Opening the Screenshot Toolbar
Press Shift + Command + 5 on your keyboard to open the Screenshot toolbar. This key combination brings up a toolbar at the bottom of your screen with several options for capturing screenshots and recording your screen.
Selecting Record Entire Screen or Record Selected Portion
The toolbar offers two main screen recording options: “R” cord Entire Screen” “and “R” cord Selected Portion.” “If you choose “R” cord Entire Screen,” “our Mac will capture everything that happens on your display. This option is great for presentations, complete tutorials, or anything that requires a comprehensive view. If you select “R” cord Selected Portion,” “you can drag to highlight the specific area you want to record. This is useful for focusing on a particular app, window, or section of your screen.
Enabling Audio Recording
Recording video without audio can be limiting. Click “O”tions” “in the Screenshot toolbar to ensure your recording includes sound. Under the “M” microphone” “section, select your MaMac’suilt-in microphone or an external mic if you have one. This step is crucial for capturing voiceovers, system sounds, or any other audio that complements your visual content.
Starting and Stopping the Recording
Once you have set up your recording preferences, click the “R” cord” “button button. A small recording icon will appear in the menu bar, indicating the recording is in progress. To stop the recording, press Command + Control + Escape or open the Screenshot toolbar again with Shift + Command + 5 and click the stop button. Your recording will be automatically saved to your desktop or another specified location.
Using QuickTime Player (macOS Earlier than Mojave)
You can use QuickTime Player to record the screen if you’re running an older macOS version. QuickTime Player is a versatile app that comes pre-installed on all Macs.
Opening QuickTime Player and Creating a New Screen Recording
To get started, open QuickTime Player from your Applications folder. Then, go to File > New Screen Recording. This action opens the Screen Recording window, where you can configure your recording settings.
Selecting Audio Input Source
Next to the red record button, you see a small arrow. Click it to reveal a dropdown menu with various options. Here, you can select your audio input source. You choose your microphone, whether it’s built-in or external. Selecting the correct audio input ensures that your voice or any other sound is captured clearly.
Recording the Entire Screen or a Portion
Click the red “Re” or” b” button to start recording. QuickTime Player allows you to record the entire screen or drag to select a specific portion of the screen you want to capture. This flexibility helps focus on particular tasks or applications.
Stopping the Recording
When you do, press Command + Control + Escape to stop the recording. QuickTime will automatically open your recording, allowing you to view and edit it immediately. The file is usually saved in the Movies folder, but you can move it to any location you prefer.
Using Dedicated Screen Recording Software
While the built-in tools on Mac are great for most purposes, dedicated screen recording software can offer more advanced features and higher-quality recordings. Let’s take a look at some of the top options.
Riverside: High-Quality Recordings, AI Transcriptions, Built-In Editor
Riverside is a powerful tool designed for professional-quality recordings. It’s endless among podcasters, interviewers, and content creators who need top-notch audio and video quality.
Features of Riverside:
- High-Quality Recordings: Riverside ensures that your recordings are crisp and clear, making them perfect for professional use.
- AI Transcriptions: This feature automatically transcribes your recordings, saving you time and effort if you need written versions of your content.
- Built-In Editor: Riverside includes an editor that lets you make quick adjustments and polish your recordings without needing separate software.
Snagit: User-Friendly with Essential Editing Tools
Snagit by TechSmith is another excellent screen recording option. It is known for its user-friendly interface and powerful editing tools, making it ideal for creating tutorials, how-to guides, and more.
Features of Snagit:
- Ease of Use: Snagit is designed to be intuitive, even for beginners. Its straightforward controls make screen recording a breeze.
- Editing Tools: Snagit has built-in editing tools that let you trim, cut, and enhance your recordings. You can also add annotations, arrows, and text to make your content more informative.
- Versatility: Snagit is not just for screen recording; it also allows you to capture screenshots and edit them with the same robust toolset.
Loom: Free Screen Recorder Extension
Loom is a free, easy-to-use screen recording tool perfect for quick recordings. It’s available as a browser extension and a desktop app, making it highly accessible.
Learn How to use loom screen recorder?
Features of Loom:
- Free Version: Loom offers a generous free tier suitable for most casual users. You can record and share videos without any cost.
- Simplicity: Loom is designed for simplicity and speed. You can start recording with just a few clicks, making it great for quick captures and instant sharing.
- Cloud Storage: Recordings are automatically saved to the cloud, which means you can access them from anywhere and share them easily with a link.
Tips for Successful Screen Recordings
To ensure your screen recordings are of the highest quality, follow these tips:
Selecting the Appropriate Audio Input
Always select the correct audio input before you start recording. This step is crucial for capturing clear and accurate sound. Whether you use the built-in microphone or an external one, double-check your settings to avoid audio mishaps.
Optimizing Recording Settings for Best Results
Take some time to adjust your recording settings before you hit the record button. Here are a few things to consider:
- Resolution: Higher resolution results in better video quality but larger file sizes. Choose a resolution that balances quality and file size based on your needs.
- Frame Rate: A higher frame rate (e.g., 60 fps) is excellent for recording smooth video, especially for gameplay or fast-moving content. For standard tutorials, 30 fps is usually sufficient.
- Audio Quality: Ensure your microphone settings are optimized for clear audio. Test your setup to find the best position and volume levels.
Editing and Exporting the Recorded Video
After youyou’vecorded your screen, you might want to make some edits before sharing it. Here are some tips for effective editing:
- Trim Unnecessary Parts: Remove any sections of the recording that aren’t intended to keep your video concise and to the point.
- Add Annotations: Use text, arrows, and highlights to emphasize important parts of your recording.
- Exporting: Choose the correct export settings for your intended platform. If you’re reloading to YouTube, use settings that optimize video quality for online streaming.
Conclusion
Recap of the Different Methods for Screen Recording on Mac
So there you have it! We’ve various methods for screen recording on your Mac, from using the built-in Screenshot toolbar and QuickTime Player to leveraging dedicated software like Riverside, Snagit, and Loom. Each method has unique features and benefits, catering to different needs and preferences.
Choosing the Best Option Based on Individual Needs and Preferences
Think about what you need: a quick and easy recording for a short tutorial, or a high-quality, professional recording for a podcast or presentation? Each method has its perks, so choose the one that fits your project best. The built-in tools are excellent for straightforward recordings, while dedicated software offers more advanced features and editing capabilities. Happy recording!